I recently picked up a BBC Micro:bit, ostensibly for the kids, but also because I really wanted to play with one. I’ve got a Raspberry PI as has, I think, everyone else, but never really got on with it. Programming it in situ was painful because it just wasn’t powerful enough and it all just felt a bit … underwhelming. It went through a stint as a print server, a NAS, an AirPlay server and, then, a dust gatherer.
So much potential, so little use. And I didn’t know why. It does the stuff but somehow the barrier to entry was just high enough that my interest never got off the starting blocks.
Bring Back The Beeb
What makes the Micro:bit different? Well, it hardly does anything. It has a
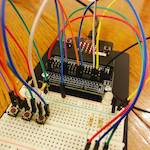
5x5 LED display, two buttons, a 3v and 0v connector and 3 I/O ports. At least,
on the surface. Plug a breakout-board into it and that expands to loads of
connectors, some with A/D convertors, some with I
This means that a very small amount of code can make something happen, and getting the code onto it is ludicrously easy. It has its own binary format called Hex and the compilers from Javascript and Python are free. Just copy the file to the device via USB mass storage and it Just Works™. In fact, most of the editors can do that bit for you so it’s one click and you’re done.
If there’s one thing I miss about my trusty old BBC Micro, it’s the expansion possibilities. Memory mapped I/O ports, analogue and digital inputs and outputs that could be written or read as easily as a variable. Essentially a BBC Micro was an 8-bit microcontroller with its own keyboard and monitor. And the Micro:bit is its spiritual successor.
It doesn’t have a keyboard and screen and speaker and the other bits that make it a useful desktop computer, but it does have the immediacy that made the Beeb so easy to work with.
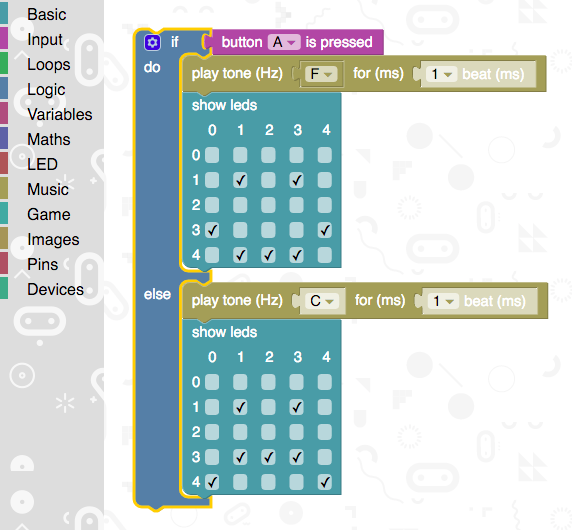
Blocks Don’t Rock
There are a number of ways to code the Micro:bit. Many of them take their lead from Scratch, the block based visual programming environment. I had a go with three:
- Code Kingdoms Javascript
- Microsoft Block Editor
- Microsoft Javascript
The choice of Javascript seems an odd one. I mean, nobody really thinks it’s a good language, do they? It’s the default language of the web by fluke and definitely, definitely not by design. And it’s the language of Node.js because, well, it is. And now it’s run server side so the same language runs at both ends of the connection. So yay for the web, I guess.
But I’m definitely not convinced its weirdness is ideal as a beginner language, and the “block by block” interfaces are clunky. It’s very hard to do much of anything beyond the absolute basics because it just gets too frustratingly slow.
So I started myself and my kids on something that involves a bit more typing and a bit less farting about with the mouse; Python.
The Tiniest Python
The Micro:bit is supported by a variant of MicroPython that has a small library
specifically for coding the Micro:bit’s various interfaces. It supports driving
the 5x5 display as a tiny set of pixels, of handling the buttons and all the
analogue and digital wizardry you might want, and even the I
To demonstrate, here is a basic sine wave that animates across the screen.
    from microbit import *
    from math import sin, radians

    offset = 0

    while True:
        display.clear()
        for x in range(0, 5):
            y = sin(radians(x * 90 + offset)) * 2.5 + 2.5
            y = min(4, max(0, y))
            display.set_pixel(x, int(y), 9)
        offset = (offset + 10) % 360
        sleep(10)
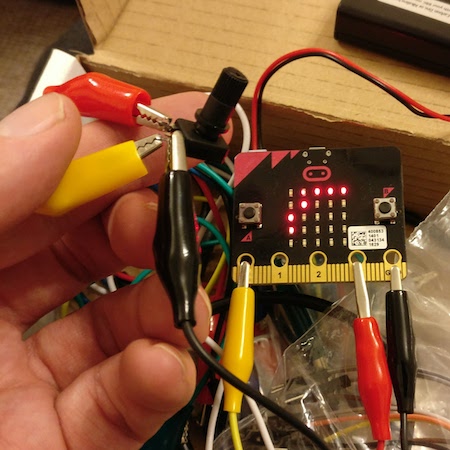
In fact, by attaching a potentiometer with crocodile clips to the 3v and 0v pads and have a third one going to pad 0 from the centre pin, you can control the frequency pretty much directly. I picked up an “Inventor’s Kit” from Kitronik along with a bunch of crocodile leads and a speaker to make getting going easier. The Micro:bit Go edition also comes with a battery pack so I’d definitely recommend that one.
    from microbit import *
    from math import sin, radians

    offset = 0

    while True:
        speed = (pin0.read_analog() // 10) + 1
        display.clear()
        for x in range(0, 5):
            y = sin(radians(x * speed + offset)) * 2.5 + 2.5
            y = min(4, max(0, y))
            display.set_pixel(x, int(y), 9)
        offset = (offset + 10) % 360
        sleep(10)
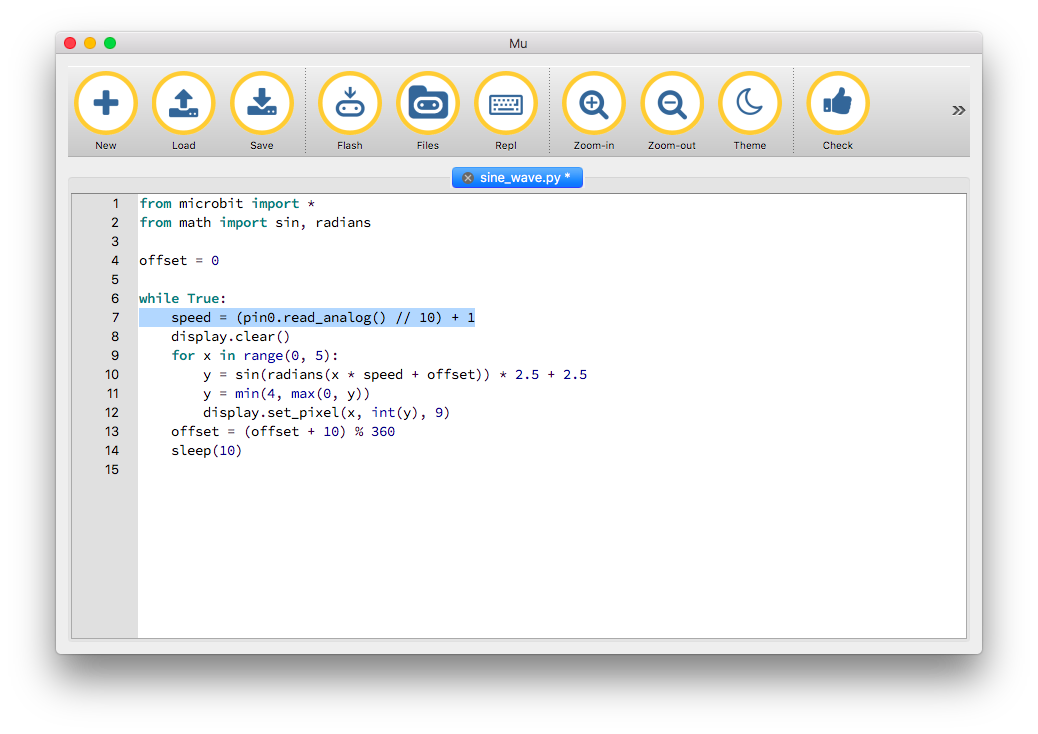
That’s it. The pin0 read will be a value between 0 and 1023 so integer division with 10 will result in a speed between 0 and 100. This will ultimately result in a flat line or, as as the potentiometer is turned, up to 1.111 full sine waves on the screen! Of course with only 5 pixels width it’s rather … crude.
But that’s it. Thanks to the large, friendly tabs for the ports, a few wires with crocodile clips and a variable resistor it’s been possible to make a working hardware interface with an A/D convertor and affect the running of the program.
The editor I used is called Mu. It’s very basic but does the job, and has handy things like a one-click flash button to build, copy and run the code on the Micro:bit, and even a REPL! (Explaining the term REPL to a 9 year old was interesting …)
Just to be flash I did a bit extra and made a program that displays animated swirling patterns based on intersecting sine and cosine waves. The pixels on the 5x5 display have 9 brightness levels so those are used to indicate the value. Press the buttons to randomise each of the two waves. Not quite the demos of yesteryear but a start!
    from microbit import *
    import random
    from math import sin, cos, radians

    def get_randoms():
        off = random.randint(0, 360)
        speed = random.randint(-90, 90)
        drift = random.randint(0 - abs(speed), abs(speed))
        return off, speed, drift

    x_off, x_speed, x_drift = get_randoms()
    y_off, y_speed, y_drift = get_randoms()

    while True:
        if button_a.was_pressed():
            x_off, x_speed, x_drift = get_randoms()

        if button_b.was_pressed():
            y_off, y_speed, y_drift = get_randoms()

        for y in range(0, 5):
            for x in range(0, 5):
                s = sin(radians(x * x_speed + x_off))
                c = cos(radians(y * y_speed + y_off))
                v = s * c * 4.5 + 4.5
                v = int(min(9, max(0, v)))
                display.set_pixel(x, y, v)

        x_off = (x_off + x_drift) % 360
        y_off = (y_off + y_drift) % 360
        sleep(10)
This terribly jerky GIF will give some basic idea of how it looks.
That’s the thing with the Micro:bit. It really is a lot of fun and the super low barrier to entry makes “just one more thing” so easy to get carried away with.
Coming up: LEDs and Switches and Sound, Oh my!